Making a desk-mounted pegboard
I recently bought an IKEA SKÅDIS 76x56 cm without figuring out how to mount it first. Living in a rented flat means I'd rather not drill into my walls - I'd have to clean it up once I leave. My first thought was to mount it on the side of my 3D printer enclosure, but the pegboard is too wide to fit, and I didn't want to cut it down. Instead, it would be nice to have it sitting against the wall at the back of my workbench.
The board could attach to the wall with 3M command strips and some 3D printed spacers, but that would mean that too much weight would pull it off the wall. It's not like a painting where the loading will be static - I'll be taking things on and off the pegboard. I'd rather have it solidly attached to the desk and leaning against the wall - maybe with some command strips just to stop it falling towards me.
Ideation
This process went a lot faster than I typically would with a proper project, because for this I just need "something that works" rather than "the best/a good solution to the problem". Typically this starts with me saying "this will do for now, and I can improve it later" - "for now" then becomes "forever".

This is quite a technical ideation page - looks and usability don't matter much for this project, so I dived straight into how it might work. I wanted something that would be fairly easy to put together, but secure once in place. It's important that I don't have to move my desk away from the wall to install/uninstall it because dragging the desk on carpet is difficult.
At this point I had a rough idea - it would be two different parts, one right-angled bracket at the front to do the supporting and mount to the table, and a piece at the back of the pegboard that acts as a nut, fitting in the slot in the pegboard.
Back pieces
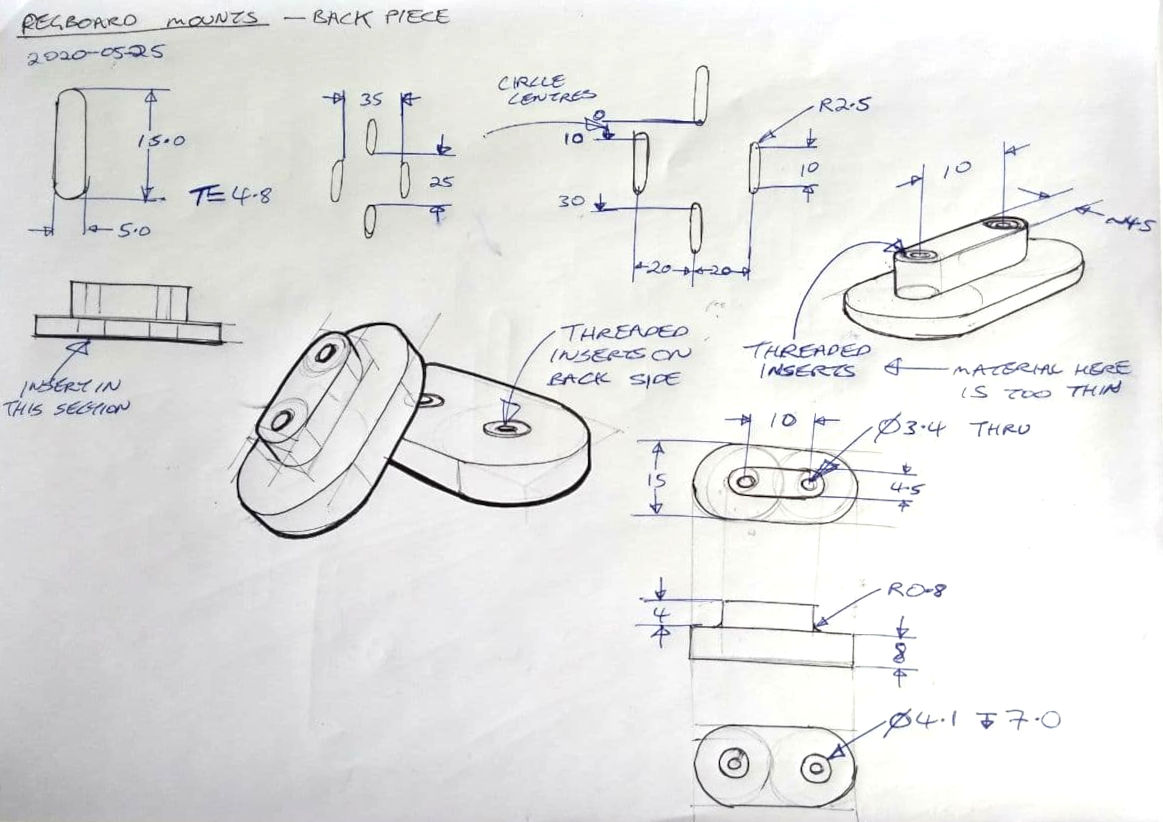
To begin with, I took some measurements of the pegboard for later reference - most of them aren't related to this piece but the desk pieces. For these back parts, I already had an idea of the rough shape, and just went with something that would work as I reached each decision on the shape.
CAD
FreeCAD is a free and open source CAD program. I'd been wanting a project to try it out a bit more thoroughly, and this was a good chance to do that. The interface is a bit clunky in some ways, so I find it a bit slower to design things than Solidworks, which I use for my day job, but it's good enough to not get frustrated. For more complex/organic shapes I prefer Rhino, but I have to boot into Windows for that. FreeCAD is also parametric so you can adjust dimensions later if a 3D printed test piece doesn't fit right.
The technical drawing makes the design easy to make in CAD, but I found a few dimensions that made sense to change, just to make the proportions look sensible. For example, the section which inserts into the pegboard doesn't need to go almost all the way through - it just needs to be big enough to locate the part properly. I changed the height of that part from 4mm to 2.5mm. This is all just making up dimensions that make sense based on experience and guesswork.

3D printing
Not long after, I had two test pieces printed at 0.2mm layer height. They looked good enough to use. This was one of those cases where I didn't realise quite how tiny the parts are until I made them. It was good that I'd made the main part wider than I thought it needed to be.
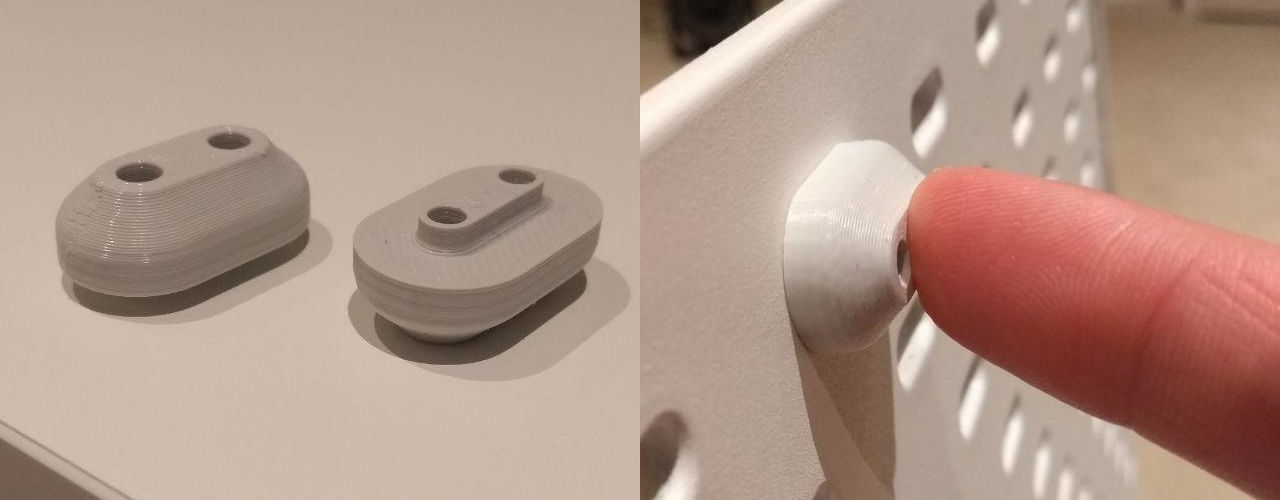
It fits into the pegboard nicely - doesn't sit proud or move around too much. I refined the CAD file to have a slightly larger radius and internal fillet, but I didn't print the updated version. The initial prints were good enough to use for the test fit.
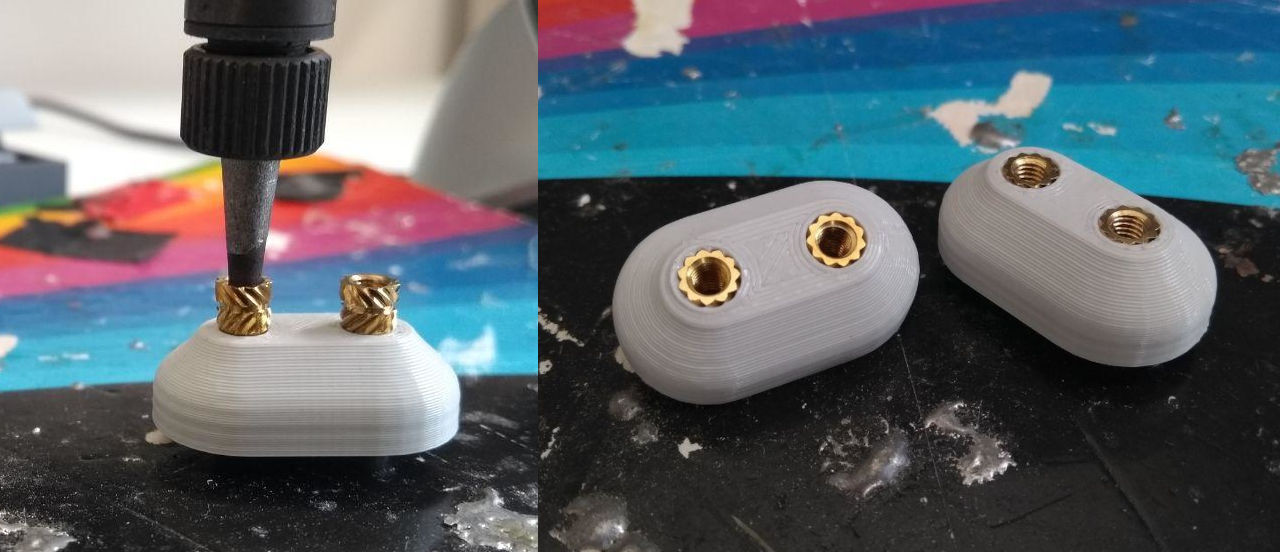
I set some threaded inserts into the part by heating them with my soldering iron. These are a great way to get proper threaded holes in a 3D printed part, and they're much less fiddly than embedding nuts into the part while printing.
Desk brackets
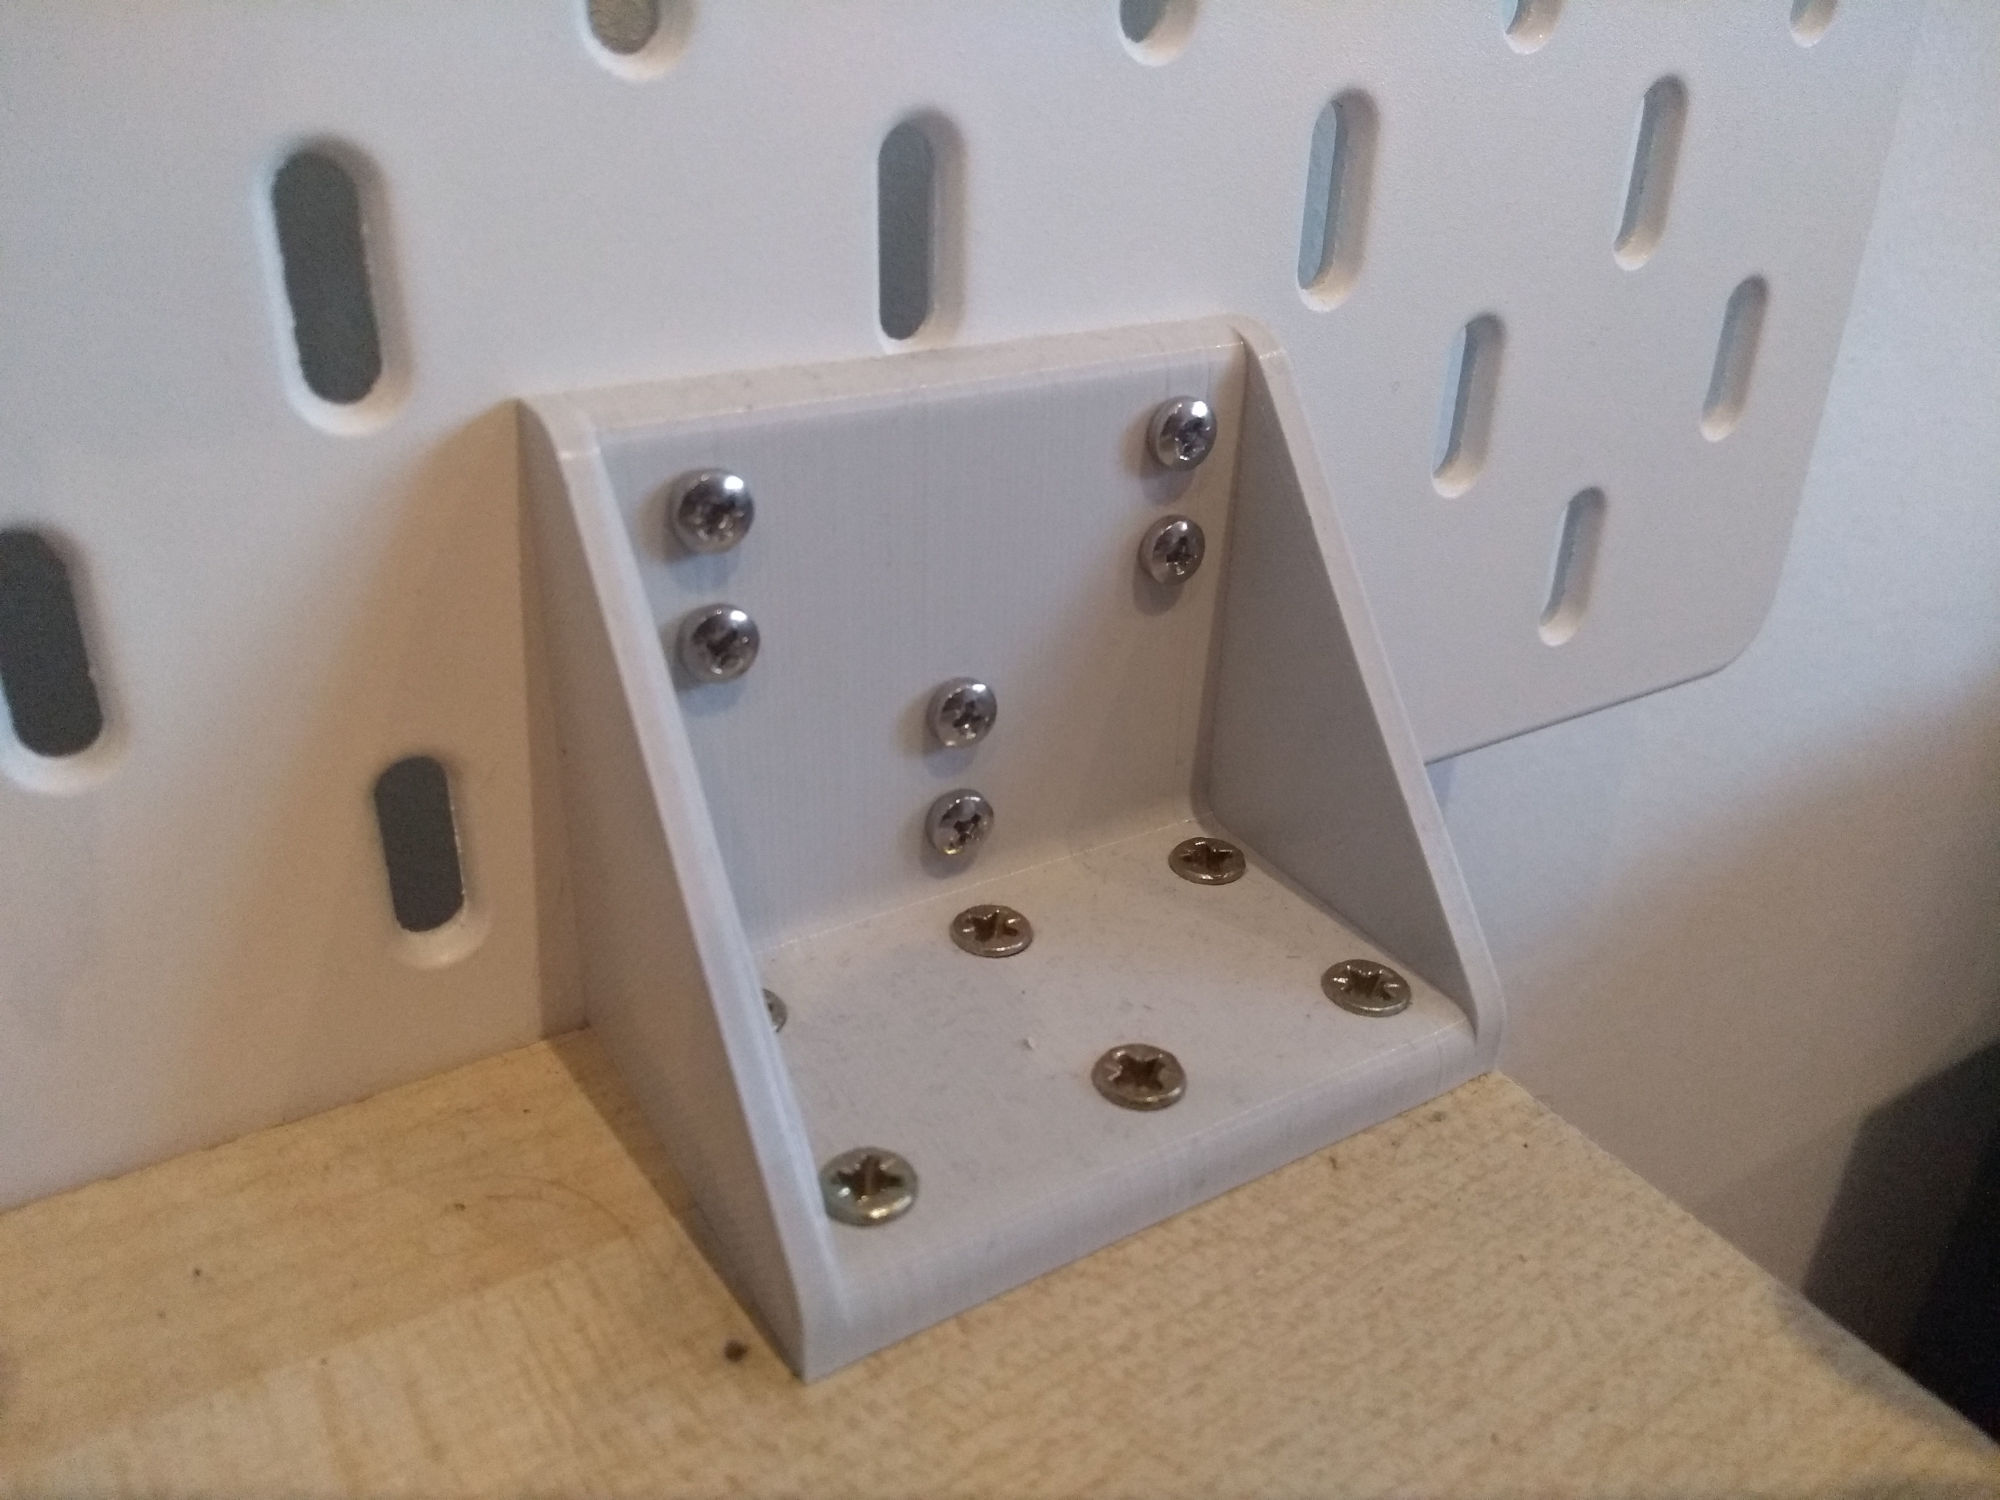
For the desk brackets, I had an initial idea formed in my head and didn't feel the need to sketch it out. I wanted to actually start using the pegboard! Using the dimensions from the pegboard I designed an initial version of the desk mounts in FreeCAD and printed it. It should print well enough on its side, with a large bridge on one of the side flanges. This was a good test for my printer's bridging settings.
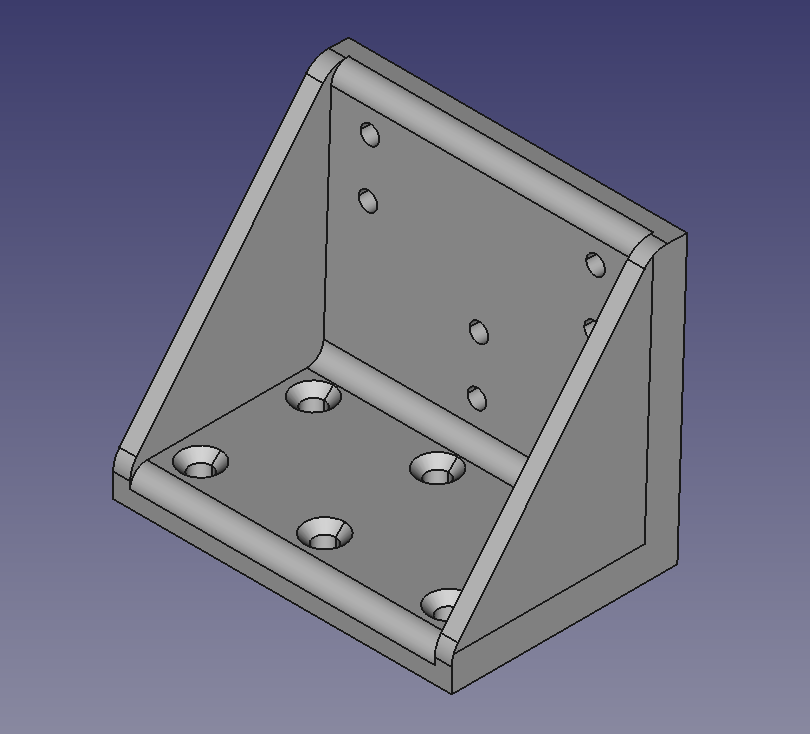
The printing went well and the pieces test-fitted fine with some M3 screws clamping the pegboard between bracket and back piece. I printed the remaining parts and mounted the pegboard to my desk.

This has been a successful project! After printing some accessory mounts found online, it's become a really nice place to keep frequently-used items. I'm wary of putting too much weight at the top, as there's not much stopping it tipping forward. I used the original wall-standoff feet supplied with the pegboard to support it against the wall. Perhaps if I load it up some more I'll need to add some command strips to stop it falling towards me. For now it's doing ok!